Friday, November 23, 2012

Hubbard Squash Soup or Hubbard Squash Curry

Hubbard Squash Soup


I've been anticipating the day when I could finally use the Hubbard squash and the last of my carrots I grew in the garden this year and what better day than on Thanksgiving when we are reminded to be thankful. I am thankful for the bounty of vegetables we grew this year.

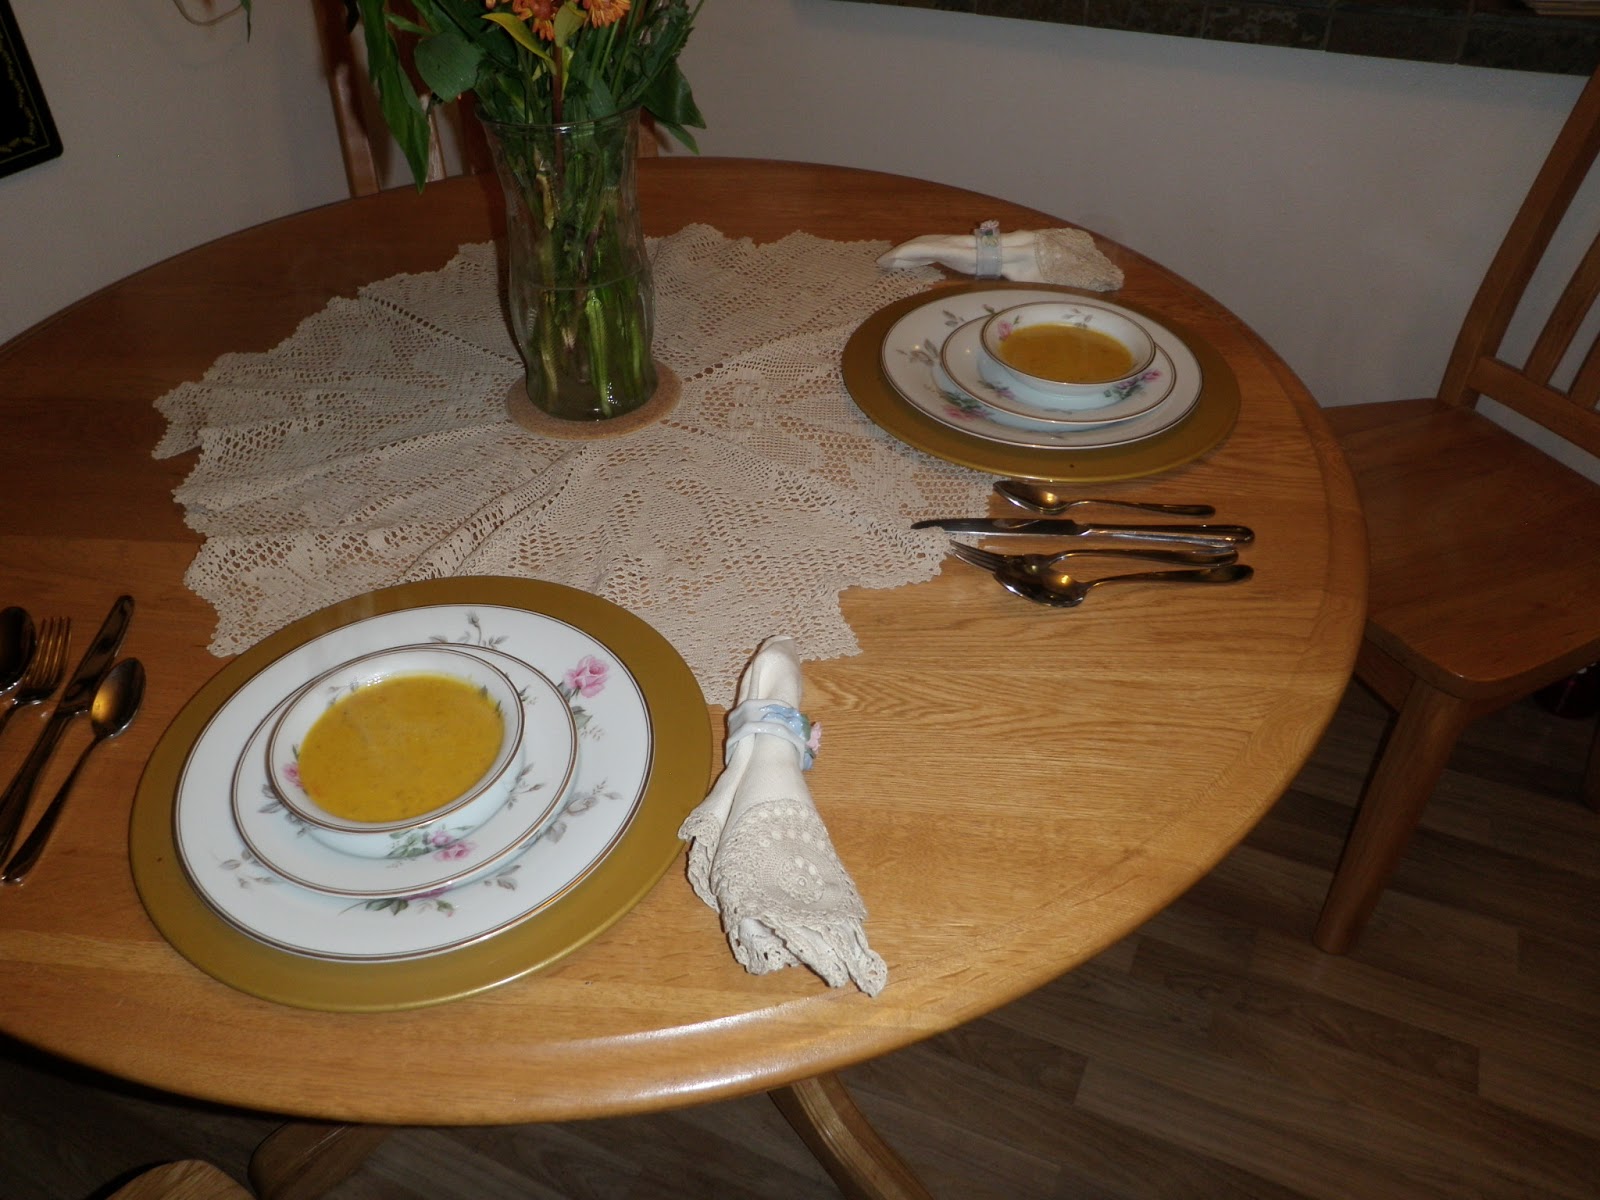
Most of the recipes I researched included brown sugar or maple syrup and I knew I didn't want something sweet. Luckily I found a recipe posted by Jillian Bedell at http://www.fromaway.com. This soup is brilliant! I knew just from the aroma wafting from the oven door that this squash was going to be one of my favorites to grow and eat from now on. Although I did change up the recipe a little by adding yellow curry to kick it up a notch.

Blue Hubbard Squash Soup
1/2 pint heavy cream (I'll use coconut milk instead next time if using curry)
1 bay leaf
1 TBSP ground sage
1/2 stick butter
3 finely chopped carrots
2 finely chopped celery stalks
1 diced onion
1/4 tsp. nutmeg
1/2 tsp. cayenne
2 cups mashed Hubbard squash (NOTE: 1 squash will make 2 recipes--Freeze the other 1/2)
2 oz. brandy (I used one of those miniatures)
1/4 cup flour
32 oz. chicken broth
salt and pepper
3 TBSP yellow curry

Preheat the oven to 350F. You don't even need to take the seeds out until after it is baked. Cut the squash in 1/2 and roast in the oven for 1 1/2 hours or until tender when pricked with a fork. Remove and allow to cool, then remove the seeds and the pulp is easy to remove from the skin. Steep bay leaf and sage in the cream or coconut milk by bringing to a boil, then reducing the heat to as low as it can go and allow to simmer while you prepare the rest of the soup. In a soup pot, melt butter and cook onions, carrots, and celery until soft. Add nutmeg and cayenne, salt and pepper to taste. Pour in the brandy and stir in squash and flour. Add chicken stock and curry, cook for 30 minutes. Remove the bay leaf and add the cream/coconut milk.

Wednesday, July 25, 2012

Kale Chips!

Summer at its peak and my plot at the community garden is bursting with produce.  A few years ago I read about the remarkable health benefits of eating kale and decided to grow and pressure can this wonderful, leafy green God of the Brassica family (cabbage).  I read in "The World's Healthiest Foods" http://www.whfoods.com/genpage.php?tname=foodspice&dbid=38 that kale is one of the most beneficial, if not the #1 veg-of-choice for warding off 5 different types of cancers, detoxifying the body and lowering cholesterol. 

Certainly my pressure-canned kale (similar consistency to any other canned greens) is a staple on my shelf that I can easily access all year long, however, kale chips are a treat that I only enjoy in the summer (unless I want to buy the fresh stuff at the store---and, truthfully, I don't even know if we can get kale in winter.)

These crunchy chips are positively addicting and much healthier than snacking on potato chips or other processed foods.  In addition, they are so easy to make that it's almost embarrassing that I bother to dedicate a post on this.  However, because I am a firm believer in sharing the wealth when it comes to good food and even better, food that is good for you, here it is.

Kale Chips
Preheat the oven to 350.  Wash kale, remove the rib and stem, break the leaf into desired size (I like about the size of my palm).  Toss with a little olive oil and a seasoning of your choice (*go easy on the salt--it's very easy to over-salt these babies).  Here are some seasoning suggestions:  salt, season salt, bbq seasoning, lemon pepper, garlic salt, onion powder/salt and the list is endless.  Place loosely in a single layer on a baking tray and bake until crispy, about 10-15 minutes.  You will want to store them in a breathable container and eat fairly soon.  I wouldn't worry though, they will disappear from sight almost immediately.  Enjoy them while you can!

P.S.  Send me your seasoning ideas too.

Tuesday, July 3, 2012

Homemade Poptarts!

Who doesn't love poptarts?  I personally do not care for the glazed kind.  Just try and find some that are not glazed or filled with unrecognizeable ingredients.  While perusing my cookbooks for berry recipes I accidentally came across a recipe for Blueberry Toaster Pastries found in "The Joy of Blueberries" ISBN: 1-59193-012-X, page 99.  There is no logical reason why you couldn't substitute any kind of jam for the blueberry jam...I am envisioning Apricot, Raspberry, even Pineapple Marmalade.  Keeping a lookout for anything new and unusual, I currently have on my shelves a Spanish Grapefruit Marmalade, Lemon Curd and even a Fig Jam.  I should label these "Adult Poptarts!"

This recipe wasn't that difficult and the dough is super easy to work with.  This would be an easy-do project to do with students.  This is what you will need:

Dough:
1/2 cup sugar
1/2 cup vegetable shortening
2 eggs
1 tsp. vanilla extract
2 1/2 cups flour
2 tsp. baking powder
1/4 tsp. salt

Filling:
Blueberry Jam or any preserves of your choice


Egg Wash:
1 egg white, beaten with 1 TBSP milk
Sugar

Preheat the oven to 355.  Beat sugar and shortening until light and fluffy.  Beat in eggs and vanilla.  In another bowl combine the flour, baking powder and salt.  Stir this into the mixture to form a dough.

Divide dough into 16 equal parts.  Use a plastic wrap over the top of a part and roll out to a 3 1/2" x 5" shape.  Spread preserves on dough leaving about 1/4" crust around the edge.   Roll out another part of dough and place over the top of the dough with preserves.  Use a sharp knife to cut away the rough edges (save the dough to make more).   Crimp all sides with the tines of a fork.  Place on a greased cookie sheet.


Beat egg white with 1 TBSP milk.  Brush the tart with egg white wash and sprinkle lightly with sugar.  Prick the top of the tarts with tines of a fork.  Place in oven and immediately turn down to 350.  Bake for 10 minutes, remove from oven and prick again with a fork.  Bake 15 more minutes (edges will be brown).  Remove from baking sheet, to a flat surface.  Cool and wrap in plastic.  Store in the refrigerator.

I got 10 poptarts out of this recipe and used 1/2 pint of blueberry jam.

Monday, July 2, 2012

Grilled Corn and Black Bean Salsa


Nothing screams of summertime more than watermelon, garden tomatoes and piping hot corn on the cob smeared with melted butter.  Naturally, I was in heaven when Fred Meyer advertised 10 ears of that yummy ripeness on sale for $5 and I immediately bought up 30 ears and processed into pints of creamed style corn with my friend Cory G. and Karen D's help.  Then my friend Karyl posted her photos of corn salsa and I knew I had to try this.  This salsa can stand alone with a bowl of tortilla chips, spoon over tacos, roll up in a burrito, or even add to a Mexican-Style Soup!  The recipe I created is probably a little spicier than most people would care for, so use your own judgement as to how spicy you want it.

Safeway is now advertising a sale of 3 ears for a $1.  Now I know my friends and family are cringing at this "sale" and get twice that in the lower 48--but to us in Alaska who are deprived of long-season fruits and veggies, this is a steal!  At the encouragement of my friend Karen D. I chose white corn over yellow this time and it came out great. 

I did not follow the recipe Karyl sent but added and pumped it up instead.  The original recipe, should you care to download it is at: http://www.naturalhomeandgarden.com/cooking/home-canning-recipes-corn-salsa.aspx

I love the smell of green chile and corn roasting on the grill.  When I read over the list of ingredients for this salsa I knew that one modification I would make right off the bat would be to roast the corn rather than boil it on the stove.  Anyone who has eaten corn on the cob both boiled and grilled knows there is a difference.  Not to say that one method is better than another, but considering the outcome I wanted (smell and texture)---grilling was the only option I would consider.


Grilled Corn and Black Bean Salsa

Ingredients:

12 ears of corn, shucked and cleaned
3 cups distilled white vinegar
1/2 cup sugar (corn is naturally sweet--original recipe called for 1 cup.  Cut that in 1/2)
2 TBSP ground cumin
1 TBSP salt
8 Roma tomatoes, seeded and diced
1 14oz. can diced tomatoes
***NOTE:  If you do not care for hot, spicy foods, you may want to eliminate or cut down on the jalapeno and Seranno
3 jalapeno peppers, roasted, peeled, seeded and diced
3 Anaheim green chiles, roasted, peeled, seeded and diced
1 red Serrano pepper, roasted, peeled, seeded and diced
1 large white onion diced
2 garlic cloves, minced
3 cans black beans, drained and rinsed
1 cup cilantro, chopped (Added LAST)

Grill the cleaned corn and peppers.  The skin on the peppers should toast--allow them to rest/sweat in a bowl covered with plastic until cool enough to skin, seed and dice.

In a large bowl, cut the kernals of corn off the cob.  Combine vinegar, sugar, cumin and salt in a large stockpot and bring to boil.  Add tomatoes, jalapenos, peppers, onion, garlic, beans and corn and return to a boil.  Reduce heat and simmer 5 minutes.  Stir in cilantro and return to boil.  Remove from heat. 

Ladle hot salsa into sterilized canning jars leaving 1/2" headspace.  Use a plastic knife to remove any air bubbles, wipe the rims clean of any juices, secure with sterlized lids and screwbands.  Process in a hot water bath for 15 minutes.  Remove jars to sit for 24 hours. 

NOTE:  Use within a year.  Don't forget to add an expiration date to your jars.

This recipe yielded 10 pint jars.


Thursday, June 28, 2012

Sea Bass with Lemongrass and Chili in Puff Pastry

Still trying to clean out the freezer so we can re-load it with salmon within the next 30 days, halibut in the next 60 days and, hopefully moose within the next 120 days.  I had full intentions of making some beer battered deep-fried halibut tonight but found some sea bass from 2008 that begged to be used first.  I remembered a recipe for a Thai-style fish and thought to revise it a bit to fit my needs--it's healthier than deep frying in grease.  I had the lemongrass and chili on hand and had recently attended the Dutch Oven cooking class this last weekend and was inspired to try a recipe that involved puff pastry and baking instead of frying.  Why can't I marinate the sea bass in a mix of spicyness and then wrap them in puff pastry and bake in parchment paper?   So here we go....a nice salad made of my own garden veggies, sea bass baked in a puff pastry, and rice mixed with fumi feritaki.  For dessert, Blueberry Cheese Cake Delight.

This is what you need:


1/4 cup lemongrass
3 TBSP fish sauce
2 TBSP lime juice
3 tsps garlic chili sauce
1 TBSP packed brown sugar
4 cloves garlic, minced
1/3 cup peanut oil
2 lbs white fish (halibut, sea bass, orange roughy etc) deboned and skinned
1 sheet Puff Pastry, thawed and rolled out to 1/4", cut into two equal parts

Mix together the lemongrass, fish sauce, lime juice, chili sauce, brown sugar, garlic and peanut oil---then emulsify in a blender, food processor or with a whisk.  Cut fish into two equal parts and marinade in the above mix for at least 45 minutes.  

Lightly roll out puff pastry and divide into two equal portions.  Place fish portion in the center and wrap with pastry crust.  Pinch seams shut and place in a parchment bag or parchment paper.  Cut two big slits to allow steam to escape.  How much fun is this?????

Bake at 400 for 20 minutes or until puff pastry is lightly browned.


Wednesday, June 27, 2012

Pizza and my new toy!

I have a new toy for making grilled pizza.  I'm re-posting my favorite pizza crust recipe (look in 2009 for the original post).  Tonight I am making just a meat lover's pizza with traditional toppings.

Jamie Oliver's Pizza Crust:

5 cups bread flour
2 cups semolina flour
1 TBSP sea salt
mix this together.......

5 tsp. yeast
1 TBSP. raw sugar
4 TBSP Extra Virgin Olive Oil
2 1/2 cups lukewarm water (make sure it is not so hot to kill the yeast, but hot enough to bribe the yeast---about wrist temp)

Mix the flours and salt, let the yeast, sugar EVOO and water sit in a bowl or measuring cup for a few minutes (until frothy and happy)...add to the flour mixture and mix with a wooden spoon until kneadable (is that a word?)

Knead until soft, elastic and pliable...you might need to add a little more flour. Let sit in a bowl until double (an hour or two). This recipe makes a whopping 6-8 medium pizzas...or in my case 2-3 big ones.  No worries about using it up all at once....this crust freezes well!  Just wrap the leftovers into individual pizza dough balls and freeze.

Now for the stone for the grill.  Place stone on the grill and turn on low for 5 minutes.  Increase to medium temp for 5 minutes.  While it is heating lightly dust a pizza skin or a cutting board with cornmeal.  Place the thinly rolled out crust on top of cornmeal dusting and add ingredients you want.  Slide the pizza onto the stone on the grill.  Close the lid and check after about 3-4 minutes...use tongs or a large spatula to turn.  Allow the crust to get crispy and the toppings to melt.  Take off heat with a pizza skin and allow to rest for 3 minutes before cutting.

If using the oven:  Preheat the oven to 475 degrees, get a stone really hot in that oven and slap down your pizza crust on that hot stone. It will begin to bake immediately and give you the next best thing to a wood fired oven baked pizza. Start putting on your toppings and you'll be a hit in 25 minutes! Pizzas should usually bake for 18-20 minutes at that temp....let them sit for 5 minutes out of the oven before slicing (I know it's hard to wait!)

Monday, June 25, 2012

Blueberry Syrup

I made a Blueberry Cream Cheese French Toast Casserole for a short overnight camping trip last weekend.  The recipe was passed onto me from a parent at our school who made this for staff appreciation week.  The recipe for the casserole can be found online at allrecipes.com and by typing in:  Overnight Blueberry French Toast.  The REAL reason for this post though is for my friend Marie Brooks whose husband Roger loved the Blueberry Syrup that is poured over the creation hot out of the oven and  is ready to serve.

NOTE:  In the casserole portion of the recipe I would increase the number of eggs to 18, add another 1/2 cup of milk and increase the maple syrup to 2/3 cup (I thought it was a little dry.)

BLUEBERRY SYRUP

1 cup white sugar
2 TBSP cornstarch
1 cup water
After the above ingredients have boiled for 3-4 minutes then add:

1 cup blueberries
1 TBSP butter

Combine sugar, cornstarch and water.  Bring to a boil and, stirring contantly, allow to boil 3-4 minutes.  Mix in the blueberries, reduce heat and simmer 10 minutes or until the blueberries burst.  Stir in the butter.  We like to serve this warm over pancakes, waffles, French toast or I suppose one could even serve over ice cream or a white cake.  This sauce/syrup will keep in a jar in the fridge for a week or two.

Saturday, June 9, 2012

German-Style Potato Salad

Bacon?  Really can any recipe that includes bacon be wrong?  This recipe comes to you from the Better Homes and Gardens Cookbook, 75th edition.  I wasn't pleased with the Ruralite recipe and have tried others...this one is yummy.  Moist, has that bacon element, and a mustard taste too.

1 1/2 lbs red potatoes, boil until almost soft about 30 minutes
4 slices of bacon, fried crisp and chopped (I am in an organic stage and use only organic bacon)
1/4 cup chopped red onion
1 TBSP flour
1 TBSP sugar
1/2 tsp Kosher salt
1/2 tsp. celery seeds
1/2 tsp. hearty mustard
dash of good black pepper
2/3 cup water
1/4 cup white vinegar

Boil potatoes until almost soft.  Peel and cut into a 1/2" dice.  For the dressing:  Cook bacon until crisp.  Crumble bacon and reserve oil.

Add onion to the bacon fat and soften (about 5 minutes).  Stir in the flour, sugar, salt, celery seeds, mustard and pepper.  Now stir in the water and vinegar and allow to thicken...you may want to add a little more water if needed.  Add potatoes and bacon...Cook for 1-2 minutes or until heated through.

I'm serving this tonight with charcoal grilled Moose Brats and some of our 2011 saurkraut!

Wednesday, June 6, 2012

Garam Masla Halibut with Watermelon Curry

Damn Supertramp!  "It's Raining Again"....that song has stuck in my head for the last 3 days...but how appropriate!  I can't get outside to garden, clean up the yard or even target practice.  It's a little chilly so what to do but cook something really decadent!  Perusing my freezer I find I have one lonely package of halibut left.  I also have a shelf full of watermelon jelly that never jelled.  What does one do with watermelon jelly that did not set? Last year, after making a batch of watermelon pickles (made of the rind), I was left with 3 large watermelons and happened upon a recipe for watermelon jelly. Sounded good at the time, but it did not set and I was left with this delicious watermelon "syrup". I've thought long and hard about what to do with these jars of ruby-colored treasures. It makes sense to pair this sweet confection with something that has a bite! Chile or curry is an obvious choice...but how and with what? I took out the last package of halibut today and knew I wanted to do something different and use that watermelon jelly.

I am using a recipe from Thailand but changing it considerably by using my watermelon syrup and adding halibut. The original dish does not include meat but tofu.  I've also changed the ingredients in that I am using garam masala heavy with cinnamon and cumin. By the way...the ONLY place I have found you can purchase whole okra is the Asian Market in the Aurora subdivision. These vendors are very friendly and helpful....it's the only place I have found kafir (lime leaves for Pad Thai and Lau Lau).  Ask me for watermelon jelly as I you wont be able to buy it anywhere. 

For the reluctant chef, I advise skipping this recipe....This is for the intermediate to advanced chef. Newbies will hate just shopping for the ingredients, much less the time it takes to prepare and cook.

Let's get started.

4 halibut fillets, skinned
garam masala, to coat both sides

Bake halibut in a 375F oven until almost done (10-15 minutes). Debone and chunk into bite-sized pieces and set aside.

Watermelon Curry:
Watermelon (peel, seed and chunk the red(**Set aside, this goes in last), cube the white peeling to cook like you would a potato. Zucchini cut diagonally
Eggplant, peeled and diced into 1" dice
10 okra, wash and slice off the head but leave intact or whole
2 sweet peppers siced
3 green chiles, sliced
Thai green curry paste (use to your preference--we like it hot)
1/2 pint of watermelon jelly
1 can Coconut Milk
1 tsp. fish sauce
Sesame Oil

**Watermelon chunks are the last to add.

Heat oil in a wok or large skillet. Add white watermelon rind, zucchini, eggplant, okra, and peppers. Cook until tender and add green curry. Add watermelon jelly and simmer for 5 minutes. Add water to simmer and reduce heat for 5 minutes. Add coconut milk, bring to a boil, reduce heat and simmer for 5 minutes. Add chunked halibut, fish sauce and the red part of the watermelon. Mix lightly and serve over rice.

Monday, June 4, 2012

Texas Caviar

Thank you Shanna and Tommy for the Everything Tex-Mex Cookbook. I am making the Texas Caviar tonight to go with the La Posta Green Chile Enchiladas. I LOVE black eyed peas, and the addition of red tomatoes, red onions, and jalaneos appelaed to me. So I am giving it a try.

This book was a gift this year for my birthday present. www.eyerything.com or ISBN 13-978-1-59337-580-5.


1 (15 oz can black-eyed peas, rinsed and drained
2 tomatoes, seeded and chopped
1 TBSP. seeded and minced jalapeno
3 green onions, sliced
1/4 cup chopped red onion
1 garlic clove, minced
2 TBSP minced cilantro
1 TBSP olive oil
1 TBSP apple cider vinegar
1/2 tsp. salt
18 tsp. cayenne

Combine all ingredients, blend well, cover and refrigerate 2 hours. Serve with chips.

Alaska Blueberry Special Cake

While clearing out some of last year's salmon to make room for this years supply I noticed that I haven't used many blueberries this year. I took out a pint and pondered what to do with them. I've already made pies, jams and syrups. Turning to a cookbook on the shelf, "Best of the Best from Alaska Cookbook", I found two recipes that competed for my attention. Alasks Blueberry Special Cake and Blueberry-Rhubarb Pie (which I WILL try later). ISBN 18936062-42-2 about $11.82 if purchasing in Alaska....$16.92 elsewhere.

This cake does take a bit of preparation but uses few ingredients and was fairly easy to prepare.

1 yellow cake mix
1 large package lemon pie filling (I like the cook and serve best---but if short on time go ahead and try instant)
1 (12 oz.) carton Cool Whip (I used 8 oz. just because I don't like whipped cream)

Mix cake according to package directions. Bake in a 9 x 13" pan. Cool. Mix lemon pie filling accordi9ng to package directions. Top the cooled cake with the lemon pie filling; let cool, cover with Cool Whip. Serve with Blueberry Sauce (see below).

Blueberry Sauce:
2/3 cup brown sugar
1 TBSP corn starch
dash of salt
2/3 cup water
2 cups fresh or frozen blueberries (yes, there is a difference between wild and farm-raised blueberries)

Cook all ingredients except the blueberries until thick. Add blueberries, return to boil, chill completely and serve over the cake.

Monday, May 28, 2012

Buttermilk Biscuits

I love breakfast probably more than any other meal of the day and what is better than hot, homemade biscuits and gravy on a crisp morning? I'd love to take credit for this recipe, but the credit goes to Ree Drummond (The Pioneer Woman Cooks, Recipes From An Accidental Country Girl ISBN:978-0-06-165819-8). This book is on the #1 New York Times Bestseller list and I highly recommend it. You can find this book as well as her equally excellent previous cookbook, The Pioneer Woman Cooks, Food From My Frontier ISBN: 978-0-06-199718-1 almost anywhere (I purchased both at Sam's Club but have seen it in Fred Meyer, Safeway, and all bookstores. The humor Ree inflects in her cookbooks actually makes it a pleasure to read! Both are reasonably priced and packed full of delicious, step-by-step visually appealing photographs and instructions for honest-to-goodness down-home food.

The author is right when she says that making biscuits can be tricky. I think the secret to a light and fluffy biscuit is in not overworking the dough. These biscuits have an excellent flavor but I had to cut the recipe in half which still made 8 good-sized biscuits. She is feeding a family of six, where it is just Jim and I. Also note that left-over biscuits can also be used for strawberry shortcake with whipped cream.


You won't be able to resist the urge to slap some butter on this treat immediately out of the oven!

4 cups flour
1 1/2 tsp. salt
2 1/2 tsp. baking soda
1 1/2 tsp. baking powder
1/3 cup shortening (I used butter-flavored crisco)
1/3 cup cold unsalted butter, cut into pieces
1 1/4 cups buttermilk

Preheat the oven to 450 degrees. In a large bowl, mix all the dry ingredients. Next add the shortening and cold butter pieces, use a pastry blender or fork to form crumbs. Here is the tricky part: Pour in the buttermilk and mix only until combined. Lightly flour a cutting board, turn out dough and roll to desired thickness (I like about 1/2"). Use a biscuit cutter or an inverted glass dipped in flour to cut biscuits. For years, before I got a biscuit cutter I used an old green beans can that had both ends cut out--ha! I still use that stupid can when I make Grandy "G" bread--Something about old habits are hard to break.

Place biscuits on a cookie sheet and bake for 11 minutes or until golden. HINT: These biscuits brown very quickly at 450 degrees, so check them after 8 minutes.

Enjoy!

Go to this website for more information on The Pioneer Woman Cooks. http://thepioneerwoman.com/

Thursday, May 24, 2012

Crab, Shrimp and Scallop Guyere Casserole with Lobster Newburg Sauce

The inspiration for this dish came from a lunch with my dear friend Carla at Pikes Landing. I had a toasted sandwich of crab, scallops and shrimp. While eating this wonderful lunch I couldn't help but think of my mushroom strata and how well these flavors would marry. My silly mushroom strata dish calls for a final topping of cream of mushroom soup. How obscene would that be with scallops, crab and shrimp! No way would I even consider this putrid combination. As a matter of fact, I wouldn't even consider the 1 lb. of swiss and thought Guyere would be better instead. In place of the "Cream of Mushroom Soup"...a Lobster Newburg sauce would be much better....Okay, so realistically, if I were to place this decadent dish on my menu and serve to others, we are looking at over $50 a plate....still interested?

Cooks beware. This is a bitch to put together.

Ingredients:
1/2 lb shitake mushrooms, sliced
1/2 lb oyster mushrooms, broken apart and sliced
1 lb white mushrooms, sliced
1 medium onion, dioced
2 cups chopped red, yellow, and orange bell pepper
2 TBSP butter
1 garlic cloves, minced
1/2 lb. crab
1 1/2 lb. raw shrimp, cleaned and peeled
1 lb. scallops, raw and quartered
2 TBSP parsley
1 tsp. Kosher salt
1/2 tsp. Restaurant grade pepper
1 lb. swiss cheese, cubed
1 lb. Guyere cheesecubed

6 slices thick white bread
margarine or butter to spread

4 eggs
1 cup whole milk

Lobster Newburg Sauce: (See again this list below....)
1 1/2 lbs lobster tail meat
4 egg yolks
1 Cup Heavy cream
1/4 cup Madeira
1/2 tsp. salt
1/2 cup butter
cayenne
nutmeg

To begin:
Slice the mushrooms, peppers and onions. Saute in butter until softened, remove from heat into a separate dish. Butter bread and cut into 1/2" cubes also set aside in a large bowl.

Melt 4 TBSP butter on low heat and add scallops and shrimp. Cook until the shrimp is almost pink. Add the cooked crab and set aside.

Divide the cheeses into three equally cubed portions.

In a deep dish baking pan, line the bottom with buttered bread. Top with some of the mushroom/pepper, a 1/3 of the seafood and top with 1/3 of the cubed cheese. Continue layering process.

Mix eggs and milk, pour over the top. Cover with foil and refrigerate for 24 hours.

Bake covered with foil at 350 for 45 minutes. Uncover and bake for an additional 15 minutes. Meanwhile make the Lobster Newburg Sauce.

Lobster tails should be premade before baking the casserole. Do this. On the underside of the lobster (the belly) cut up the side using a pair of kitchen shears. Do the same to the other side. cut the membrane near the tail to remove the belly casing. Next remoe the tail meat from the shell leaving it yet intact. Now lightly salt, squeeze lemon juice over the tail meat and place a slice of butter on the tail and wrap in foil. Bake tails for 15 minutes at 425. Remove tails and roughly chop and set aside.

Lobster Newburg:
4 egg yolks
1 cup heavy cream
1/4 cup madeira
1 tsp. salt
1/2 cup butter melted
cayenne
nutmeg
1 1/2 lb. lobster meat, chunked

Melt the butter, mix the yolk/cream/madeira together and add to the butter. Stir constantly until thickened. Do NOT boil this....add cayenne and nutmeg to taste. Add lobster to heat through...we are not overcooking the lobster here! Pour over the casserole and serve immediately with a glass of chilled Chardonnay. If you really love the person that you made this for, clean up your dishes and follow up with some sliced fresh strawberries and champagne.

Saturday, May 12, 2012

Baked Potato Salmon Chowder

I really didn't expect anyone to ask for this recipe.....But when I posted my dinner plans on FB I was enundated with requests for a recipe. This one is easy...kind of. You need to poach the salmon ahead of time, debone and flake it.

My Uncle Melvin loved this soup (then minus the salmon).

SALMON:
Poach 1 lb. salmon for 8 minutes on simmer, allow to sit for 10 minutes. Drain, skin, debone, flake and set aside.

4 large baked potatoes
2/3 cup flour
1/4 cup chives
2 cups bacon, fried crisp and crumbled
2/3 cups butter
1 1/2 qts. half and half
1 cup sour cream
5 oz. cheddar cheese
salt and pepper to taste.

Bake potatoes. Skin and cube them to 1" cubes. Melt butter blend in flour, add half and half whisking contantly until thick. Add salt, pepper, potatoes, chives, cheese sour cream. Now add potatoes and deboned salmon heat through and serve.

Serving Suggestions: Crusty bread, salad, and Chardonnay

Baked Brown Rice with Onions and Roasted Red Peppers

I love all things natural and organic. This brown rice recipe requires some prep, but bakes in the oven and is really tasty.

1 TBSP. olive oil
2 medium minced onions
salt and pepper
2 1/4 cups water
1 cup chicken broth
1 1/2 cups long-grain brown rice, rinsed
3/4 cup roasted red peppers, chopped
1/4 cup Parmesan cheese, grated
1/4 cup minced fresh parsley
1/2 tsp. lemon juice

Preheat the oven to 375. Heat the oil in a Dutch oven over medium heat. Add the onion and 1/4 tsp. salt and cook until browned (12-14 minutes). Add water and broth, cover and bring to a boil. Take off the heat and stir in rice. Cover and bake until rice is tender, 65-70 minutes.

Remove from the oven, uncover and fluff the rice while stirring in roasted red peppers, Parmesan cheese, parsley and lemon juice.

Lay a clean folded kitchen towel under the lid and let sit for 10 minutes. Seasoin with salt and pepper to taste.

Sunday, May 6, 2012

Warm Spinach & Shrimp Salad with Raspberry Vinegar Dressing

2 cups small shrimp, cooked
10 oz. fresh spinach
1 cup fresh sliced mushrooms
1/4 cup butter
1/2 tsp. minced garlic
1 sweet pepper chopped
1/4 tsp. pepper

Hot Bacon Salad Dressing:
1/4 lb. bacon, chopped and fried crisp
1/4 cup raspberry vinegar
1/4 cup Splenda
2 TBSP. water
1/2 tsp. ginger

Fry bacon to crisp. Add vinegar, Splenda, water and ginger and bring to a boil. Take off heat but keep warm. Heat butter in a large skillet. Add garlic and saute for 2 minutes, add mushrooms and peppers, lower heat to medium low and cook until heated through. Add shrimp and drain all in a colander. Mix together the bacon dressing and the vegetable mixture. Tear spinach in a large bowl, top with dressing mix and serve. Optional: Very pretty salad with some grated Parmesano/Reggiano cheese on top.

Cauliflower Crust Pizza Oh My!

Good carbs vs. bad carbs

I'm trying really hard to stay away from bread and recently heard about this flourless crust. I think there might be a recipe on the Weight Watchers website for another version. While this is not a slice you can really pick up with your fingers and eat, it is very good and no one would be any wiser that it was actually made of cauliflower. The garlic and oregano really enhance the flavor of this crust.

One head of cauliflower will make 3 pizza crusts and each pizza will feed two people.

This is what you will need:


1 cup riced cauliflower (after riced, cooked in the microwave)
1 cup shredded mozzarella cheese
1 egg, beaten
1 tsp. dried oregano
1/2 tsp. minced garlic
1/2 tsp. garlic salt
Olive Oil (optional)

Pizza sauce, shredded cheese (I like to use a mix of fontina and mozzarella), your choice of toppings.

Directions:

To "rice" the cauliflower:
Take one large head of cauliflower, remove stems and leaves and chop the florets into chunks. Place in a food processor and pulse until it resembles grain--DON'T overpulse to a puree. Or, if you don't have a food processor, grate the cauliflower florets using a cheese grater. Place the cauliflower "grains" in a microwave-safe dish and cook on high for 4 minutes, stir and microwave 4 more minutes, set aside to cool slightly. Meanwhile, preheat the oven to 450 and spray a pizza pan with nonstick spray.

In a medium bowl stir together egg, mozzarella, oregano, garlic, garlic salt and cauliflower. Transfer to the cookie sheet and "mold" into a 9" round. Optional: Drizzle lightly with olive oil to help with browning.

Bake for 15-20 minutes or until browned.

Remove from oven and assemble toppings. Place under broiler at high and heat until cheese is melted and toppings are hot.

Sunday, April 22, 2012

Artichoke and Green Chile Dip

Getting back in touch with my psuedo-stomach this past week has been both challenging and rewarding. I've pulled a number of healthy gastric bypass friendly cookbooks that were collecting dust off the bookshelf and have become reaquainted with how easy it is to feel full on very little just by following the simple rules Dr. Ellner taught me using the TOOLKIT (This is the beginning. Only you make the choices that One day at a time, will change your Life! Keep on Track. Implement change, and Take control.) As an additional bonus I lost 4 lbs in 4 days!

I recently made Thai Pork Tenderloin with Grilled Cabbage and Onions, Chili Vermouth Salmon with Rosemary Roasted Potatoes, Halibut Marinara and today am making a wonderful Artichoke and Green Chile Dip to share with the RSMS family tomorrow. I'll serve this with whole grain crackers, corn chips and I'll eat it with dipping veggies.

The recipe comes from Carnie Wilson's cookbook To Serve with Love ISBN: 1-4019-0602-8 for $19.95. Those who love artichokes will want to make this often.

Ingredients:
Two 14-oz cans quartered artichoke hearts packed in water, drained and chopped into 1" pieces
Two 14-oz cans artichoke bottoms packed in water, drained and chopped into 1" pieces
1 1/2 cups light mayonnaise
1 cup light sour cream
1 1/2 cups grated Parmesan cheese
1/2 cup 2% jack or mild cheddar cheese, grated
One 4-oz can diced green chile (use fresh if you have it---and I did!)
2 cloves garlic, minced
1 TBSP lemon juice

Combine all ingredients in a Crock-pot and cook on low for 2-3 hours or until heated through (the longer it is in the crock pot the better it tastes. (Oven method: Bake uncovered at 350 for 30 minutes.) Carne recommends serving with veggies, tortilla chips, jicama sticks or crispy rice crackers.

Saturday, April 21, 2012

Halibut Marinara

I love my halibut! You can't ruin halibut even if you try. This is a great recipe that I seriously altered from a recipe from a cookbook. I made it even more health conscientious than adding an unnecesary 4 TBSP of butter.


1 1/2 lbs halibut fillets, skinned
2 cups Mezzetta Porcini Mushroom Sauce (yeah it is expensive at $9.00 a bottle-but worth it)
1 cup mixed mushrooms (I use a combination of white, shitake,and portabella), chopped
1/2 cup sliced black olives
1 cup Mozzarella, grated

Oil a baking dish. Place skinned fish in oiled pan, top with mushrooms, olives and spaghetti sauce.


Bake at 400 degrees for 10 minutes, top with the cheese and bake another 10 minutes or until fish flakes easily with a fork.

Serve with Penne Pasta or a Mushroom Risotto....I am making this with a Truffle Cheese Risotto.

Sunday, April 15, 2012

Ganado Cafe Burritos.....the Thursday Special

At 18, I ran a restaurant with my mom on the Navajo Indian Reservation in Ganado, Arizona. Right next to the Trading Post, we were the only restaurant within 50 miles. We served the best pie, french fries, hamburgers and breakfast one could ever have. This is the same place I grew up and went to Elementary School. Every day we had a "Special". Our Ganado Burritos were served every Thursday and were always sold out. Like mom's Lemon Meringue Pie, there were never any leftovers! This recipe is so easy, but a bit time consuming.

3 lbs. lean beef stew meat cut into large bite-size cubes
2 large tubs of frozen green chile (don't try to use canned....it won't work)
2 TBSP garlic, minced
salt and pepper

2 TBSP cornstarch (later)

Cut the cubes of beef to large chunk size pieces. Place in a large stewpot. Cover, set heat on the stove to medium. When the meat begins to release liquid and starts to simmer, add green chile, garlic, salt and pepper. Simmer covered for 2-3 hours until the beef falls apart. Mix the cornstarch with a little water to thin and add to the beef/chile mixture to thicken just a little.


Heat large flour tortillas, spread some of the chile mixture on the grilled tortilla, sprinkle with cheddar or cheese of choice. Roll into a burrito. Can serve with sour cream and lettuce if you like.

Saturday, April 14, 2012

Dutch Oven Moose Cubed Steak Slow-Cook Veggie Pot

2 lbs. cubed moose steak (or use beef)
1 onion, rough chopped
Fennel Bulb and fronds, rough chop
6 large carrots, 1 1/2" cuts
4 or more potatoes, cut into fourths
2 tsp. minced garlic
4 sprigs thyme
3 TBSP parsley, chopped
2 cans beef gravy
1 cup marsala
*Mushroom buttons would be a good addition to this dish!

Lightly salt and pepper the cubed steak. Dredge in flour and brown in a large Dutch oven pot in oil on both sides. Remove meat from pan. Add the onion, fennel, carrots, potatoes, garlic, thyme, and parsley. Allow the browned part on the bottom to release and begin to soften.

Cut chopped steaks into large pieces. Add marsala to the veggies simmering on the stove. Add the moose/beef and the 2 cans of gravy. Remove from heat.

Preheat the oven to 300 degrees. Bake the Dutch oven for 2.5 hours or until vegetables are tender.

Serve this with sourdough bread or other Artisan Bread.


Monday, April 9, 2012

Thai Pork Tenderloin

1 lb. pork tenderloin
1/2 cup soy sauce
1 TBSP. onion powder

Peanut Sauce:
2 TBSP. Teriyaki sauce
2 TBSP peanut butter
1/4 tsp. crushed red pepper

Liberally powder the tenderloin with onion powder. Brush 1/4 cup Teriyaki sauce over pork loin. Place tenderloin over hot grill. Grill uncovered for 25 to 30 minutes turning frequently until internal temperature reaches 155F.

Meanwhile in a small bowl, whisk together 2 TBSP. Teriyaki sauce and 2 TBSP. water. Whisk in the peanut butter and red pepper mixing until a smooth consistency. Transfer tenderloin to a serving dish and top with peanut sauce.

Serve this sauteed cabbage and onions.

Saturday, March 31, 2012

Corn Pone, Cornbread, Whatever...my Aunt Marcia's is the best!

My Aunt Marcia made the best cornbread, Hands-Down, EVER. You want a winner? This is it. Yes, it is a sweet recipe and an easy to make cornbread, but you can add jalapenos to it and it is just as good. I am serving this tonight with a -salmon chili....yup, we like it hot....there are lots of red peppers, chili and beans.....Aunt Marcia's Cornbread is the ONLY saving grace.


1 C cornmeal
1 C flour
4 tsp. baking powder
1/2 cup sugar (yep I like it sweet)
1 tsp. salt
2 eggs
1 C milk
1/4 C oil..(to be honest, I use Olive oil)


Cook for 20-25 minutes.

REALLY? SERIOUSLY?....UM LIKE....NOPE. You won't find a better recipe than this for cornbread....My southern realatives have my back on this and my Southwestern cousins have me covered in the southwest.....thank you God for relatives all over the place....but couldn't you throw in some Asian culture? Once you try this cornbread you will never go back.

Saturday, March 24, 2012

Fall-Apart Pork Butt AKA Pulled Pork

Jim and I love Big Daddy's BBQ here in Fairbanks! They even won best BBQ in Texas which is saying a lot! I will be using a local Fairbanks bottled BBQ sauce in the end called Lead Dog BBQ Sauce, (I get it at the organic market off of Airport) it's a little on the sweet-side, which I normally do not like, but this is good sauce.

1 pork butt (5 lbs)
1 head of garlic
1/3 cup worcestershire sauce
1/2 cup brown sugar
2 6oz cans pineapple juice
1/2 tsp. salt

Trim excess fat off the butt (gosh don't we wish it could be that easy with humans?) Peel and slice large garlic cloves into slivers. Punch a hole in the butt and insert a garlic clove. Repeat all over the meat. Sprinkle worcestershire sauce all over the butt, cover and chill overnight.

Heat the oven to 400. Now massage brown sugar into the meat. Pour pineapple juice in the bottom of the pan-AVOID pouring over the brown sugar. Cover the butt with a tight lid.

Place in the oven and immediately lower the heat to 200. Cook for at least 5 hours. Test...the meat should be so tender that it literally falls apart.

Remove the meat from the pan and add salt to the juices in the bottom. Serve the meat with the juices or use barbecue sauce and serve on grilled buns.

I'm serving ours with oven roasted yams.

Thursday, March 15, 2012

Panko and Macadamia Nut Crusted Salmon

The Fairbanks Cookbook Club recommended the Panko-Crusted Salmon recipe in our adopted cookbook, "How Easy is That?". I really love my macadamia nut crusted salmon and it only made sense to combine both recipes. We all agree that salmon loves lemon and parsley. But salmon also loves nuts, panko crumbs and a dash of mustard...so this is a perfect match of ingredients coming together to deliver the most for our subsistence fish in Alaska. How funny that I took out a package from the freezer to find that they are all tails (Jim's favorite part of the fish).


2/3 cup panko crumbs (Japanese bread flakes)
2 TBSP fresh parsley, chopped
1/4 cup finely minced macadamia nuts
1 tsp. lemon zest
1 tsp. kosher salt
Fresh ground black pepper to taste
2 TBSP. good olive oil (Yep...I paid $23 for a pint!)
4 - 6 to 8 oz fillets of salmon, skin on
2 TBSP Dijon mustard
2 TBSP vegetable oil
Lemon wedges, for serving

Heat the oven to 425. Mix together panko, parsley, nuts, lemon zest, 1/2 tsp. salt, pepper. Drizzle with olive oil and stir the crumbs until they are evenly coated.

Spread salmon with mustard, then salt and pepper the fillets. Next, press the panko mixture thickly on top of the mustard on each fillet. The mustard will help the crumb mix to adhere.

Heat the oil over medium-high heat in a cast iron skillet. Add salmon skin side down and sear for 4 minutes...do not turn.

Transfer fish to a baking dish and bake in the oven for 7 minutes or until salmon is ALMOST done and panko is browned. Remove from the oven and cover with foil. Let fish rest for 10 minutes. Serve with lemon wedges.

Gumbo Z'Herbes (Green Gumbo)

When I think about greens, I first think of my mother who never met a green she didn't like and passed on her love of all forms of Brassica to all her children. I think of the simplicity of southern food--AKA comfort food. I think of my garden in summer and giving away the leafy, nutritious treasures to friends, pressure canning dozens of jars and shelving them for cold days like this in the dead of winter.

This hearty dish is described as one that breaks all the rules about gumbo. It uses neither okra or file'. It is the only gumbo in which the roux is not prepared first. Originally, it contained no meat, seafood, or game. Futhermore, it also does not contain the holy trinity or magic three of peppers, celery and onion. This gumbo started out as a traditional Lenten dish to be served on Good Friday. Legend had it that you would make as many friends as the number of different greens you put in the pot. Eight greens = eight new friends. The flavor that evolves from combining many different greens is what makes this gumbo so delicious. Today, this dish has seen the addition of meat. Like all gumbos, expect an obscene amount so be prepared to either share with a crowd or freeze the leftovers. The most difficult part of making this dish is washing, rinsing and preparing the greens.

For you haters of gumbo--No, there is no okra or file' in this recipe. That's usually the first question people ask me when I make and offer gumbo. I don't know what it is that people hate about okra. Okay, it does have that "snot-like" consistency, I'll give you that, but the good: okra is low in saturated fat and sodium, and very low in cholesterol. It is also a good source of protein, riboflavin, niacin, phosphorus, potassium, zinc and copper, and a very good source of dietary fiber, vitamin A, vitamin C, vitamin K, thiamin, vitamin B6, folate, calcium, magnesium and manganese. Never mind the lecture about the benefits of okra, and I'll get off the okra soapbox--as I said, this gumbo does not call for okra!

The recipe comes from "The New Orleans Cookbook" by Rima and Richard Collin, ISBN: 0-394-75257-9, April 1987.


Greens: As many of these as are available, a minimum of 5 is adequate, 7-8 are perfect
*most of these greens I had canned from our garden--they need not be fresh picked (I used collards, mustard greens, turnip greens, parsley, spinach, radish tops, cabbage, chicory and kale)

Select from the following:
1 bunch collard greens
1 bunch mustard greens
1 bunch turnip greens
1 bunch shallots (scallions)
1 bunch parsley
1 bunch watercress
1 bunch spinach
1 bunch beet tops
1 bunch radish tops (I didn't know you could eat radish tops and always threw them away!)
1 small head green cabbage
1 bunch chicory (AKA Belgian Endive--who knew!)
1 bunch carrot tops
1 bunch kale

Gumbo Base:
1 cup chopped onion
1/2 lb. lean baked ham, cut into cubes
1/2 lb. Creole (Polish, French garlic, Portugese)sausage cut into 1/2" cubes
1/2 lb. veal or chicken cut into 1/2" cubes (I used chicken)

Roux:
1/2 cup vegetable oil
2/3 cup flour

Liquid and Seasonings:
2 qt. chicken stock plus 1/3 cup cold water (I used turkey stock I made and froze last year)
1 tsp. salt
1/4 tsp. freshly ground black pepper
1/8 tsp. cayenne (we like it spicy so I used more)
2 whole bay leaves, crushed
1/2 tsp. dried thyme
1/2 tsp. dried marjoram
2 whole cloves
6 whole allspice

Rice: Enough for everyone
Louisianna Hot Sauce: Garnish

Wash the greens really well--they have a reputation for holding onto sand and dirt. Place greens in a colander and rinse under cold running water. Drain excess water. Place greens in heavy 3 to 4 quart pot or dutch oven. Add 1/3 cup cold water and turn the heat to medium high. When the liquid at the bottom of the pan begins to boil, cover the pan tightly, reduce the heat to medium low and cook the greens for 12 to 15 minutes or until tender. Remove the pan from the heat and reserve the liquid formed from cooking by draining the greens. Chop the cooked greens fine and set aside.

In a large 7-8 quart pot heat the oil, keep heat at medium-low and add the flour. Stir constantly until flour reaches a peanut butter color. Add onion and stir thoroughly and continue browning for 5 more minutes stirring constantly. Add the ham, sausage, veal/chicken and the liquid reserved from the greens. Mix well and stir in the greens and seasonings. Turn the heat to low and add 2 quarts broth. Bring the gumbo to a boil, reduce heat again and simmer for 1 1/4 hours stirring every now and then. Serve over rice--of course! For those of us who like it REALLY spicy, dash on some Louisianna Hot Sauce.

So, I used 9 different greens, so I am now eagerly awaiting making 9 new friends.

Tuesday, March 13, 2012

Neiman Marcus Cookies or Million Dollar Cookies

First let me put to rest the myth about Neiman Marcus and those wonderful chocolate chip cookies. According to Snopes...the lawsuit is not real!

I am adapting only one dozen of these cookies for my sweet, hunky hubby...a coffee addict....I am embedding a coffee bean in each of his cookies. I will only do this for him.

WARNINGS:
1. This recipe makes an obscene amount of cookies....like in the 100's. They are addictive, you will want to share them with everyone.

2. You will be spending an enormous amount of prep time....you need to turn oats into an oat flour using a food processor or blender

3. There are many expensive ingredients. Be patient or if you can't afford hours and hours baking them--then bypass this.


1 lb. unsalted butter
2 cups sugar
2 cups brown sugar
4 eggs
2 tsp. vanilla
4 cups flour
5 cups blended oatmeal
1 tsp. salt
2 tsp. baking powder
2 tsp. baking soda
24 oz. chocolate chips (I use 1 pkg. of dark chocolate and 1 pkg. of semi-sweet chocolate)
1 3.5 oz. bar Lindt Dark Chocolate with Sea Salt (grated)
3 cups chopped nuts (pecans or walnuts)
*OPTIONAL: coffee bean or coursely ground coffe beans

Cream the butter and both sugars. Add eggs and vanilla; mix together with flour, oatmeal (that has been previously blended), salt, baking powder, and soda. Add chocolate chips, Lindt bar and nuts. Roll into balls and place two-inches apart on a parchment-lined cookie sheet (it makes clean-up so much easier). Bake for 15 minutes at 375. Makes approximately 112 cookies.

An Appetizer Worth Mentioning Soppressata and Cheese in Puff Pastry

I joined the Fairbanks Cookbook Club last month and the first cookbook we chose was "Barefoot Contessa: How Easy is That? I must admit I was a little leary because Ina has always just been a little too fancy and involved of a chef for me. I'm just a simple, down-home cook who enjoys cooking basic, feel-good, healthy foods. I have been, however, pleasantly surprised by all of the recipes I have tried in this book. Even though she is a little heavy on the salt in some places (thank goodness I adjust before adding it all!), it has been a pleasure trying these recipes and I wholeheartedly encourage everyone to get a copy. Putting in a plug here for those of you who live in, or close to Fairbanks, please support our locally-owned bookstore, Gulliver's Books--who give so much back to the community and public education. ISBN: 978-0-307-23876-4 $35.00 is a lot in my opinion to spend on a cookbook, but this one, you will find, is well worth your investment.

Here is a link to Gullivers: http://www.gullivers-books.com/ (While here, also look for their step-by-step recipe for Hungarian Mushroom Soup served only on Thursdays and is to die for!)

This recipe will make a fabulous appetizer, or a great addition to a brunch or lunch with a side salad. As an appetizer, expect about 8 servings, as an entree with a salad, expect 4-6 servings.

1 package (2) sheets frozen puff pastry (defrosted)
2 TBSP Dijon mustard
12 thin slices soppressata salami (3 1/2") diameter. I had to use a different salami from the deli section.
6 oz. Guyere cheese, grated
1 egg with 1 TBSP water, beaten to brush the crust.

Set oven to 450. Roll out a sheet of pastry to 10". Place pastry on a parchment paper lined baking sheet. Spread with Dijon leaving a 1" border. Top with salami, then grated cheese. Brush the 1" border with a little of the egg wash. Roll out next sheet of pastry to 10" and cover the ingredients with this sheet. Brush the pastry with egg wash. Place in the fridge for 15 minutes. Using a sharp knife. Cut all four sides to make even (this also SEALS your pastry.)

Bake 12 minutes. Place another parchment paper over the top of the pastry, lift and flip the sheet over to bake the other side. Remove the parchment paper and bake the unbaked flipped side 12 more minutes or until brown and flaky. Allow to cool for 5 minutes before slicing.

Honestly, I am all about changing up recipes whenever I can, tweaking them to make them my own. But this recipe stands apart and I wouldn't change one thing.

Other recipes I've tried and enjoyed from this book are: Chipotle and Rosemary Roasted Nuts, Stilton and Walnut Crackers, Buttermilk Ranch Dressing with Bibb Lettuce, Roasted Vegetable Frittata, Baked Fontina, Lemon Chicken Breasts, Roasted Shrimp with Feta, Garlic-Roasted Cauliflower, Flat (Green) Beans with Pecorino, Potato Basil Puree and Cranberry Apple Easy Cake

Proscuitto and Asparagus-Artichoke Pasta

This recipe comes from Sunset magazine, March, 2012 pg. 100. Thinking of my friend Georgina who is allergic to shellfish but loves pasta, I came upon this dish and thought of her. I had some steamed artichokes and added two diced artichoke crowns to the original recipe. We love garlic so I doubled this ingredient. We also enjoy the bite that chile flakes provide so I was liberal with that ingredient as well. Don't skimp on using cheap olive oil or parmesan either--it's worth investing in the good stuff.

8 oz. Angel Hair or Spaghetti
1 TBSP. good olive oil
1/2 large onion, diced
4 garlic cloves, minced
2 cups sliced mushrooms
4 oz. thinkly sliced and diced proscuitto
1 lb. asparagus, trimmed and cut into 1" pieces
2 artichoke crowns, cubed
1 1/4 cups heavy whipping cream
1/4 cup grated parmesan cheese
1/2 tsp. pepper
1/2 tsp. chile flakes

Cook the pasta, drain and return to pot. While pasta is cooking, heat oil over medium-high, cook onion, garlic, and mushrooms for 2-4 minutes. Add proscuitto, asparagus, artichokes and cook until asparagus is tender and bright about 2-4 minutes. Add cream, cheese, pepper and chile flakes. Reduce heat to simmer and cook until sauce has thickened (4-5 minutes). Plate the pasta and pour the sauce over the top. Toss to coat and serve with a light dusting of parmesan. This recipe goes very well with Soppressata and Cheese in Puff Pastry as an appetizer (see next blog)

Sunday, February 19, 2012

Cranberry-Apple Easy Cake

As part of the newly formed FNSBSD Cookbook Club, I just ordered the cookbook "The Barefoot Contessa: How Easy Can It Be?". A preview recipe on Amazon.com inspired me. I had the cranberries on hand and only needed to get a Granny Smith apple to complete this recipe. This will go wonderful with my Baked Pork Chops, Cranberry-Walnut Stuffing, Mashed Potatoes and home-canned Green Beans. A PERFECT Sunday dinner.

Ingredients:
12 oz. fresh cranberries, rinsed and drained
1 Granny Smith apple, peeled and diced
1/2 cup brown sugar (I used Splenda Brown Sugar)
1 TBSP grated orange zest
1/4 cup fresh squeezed orange juice
1 tsp. cinnamon

Mix the above ingredients and set aside.

In a bowl using an electric mixer, beat the following:

2 eggs, for 2 minutes on medium speed
1 cup sugar
1 stick or 1/4 lb. unsalted melted and cooled butter
1 tsp vanilla extract
1/4 cup sour cream
beat this until combined. On low speed add
1 cup flour
1/4 tsp kosher salt


Pour the fruit mixturee into a 10" glass pie plate. Pour the batter over the top. Combine the following:

1 TBSP sugar
1/8 tsp. cinnamon


Sprinkle this over the batter. Bake 55-60 minutes or until a toothpick comes out clean. Serve warm or at room temp.

Skinny Oven Fries

Simply Colorado: Nutritious Recipes for Busy People published by the Colorado Dietetic Association cannot be purchased in any bookstore. I love this cookbook! Every recipe is packed with healthy, tasty ingredients. Some of my favorite recipes include: Garbanzo Nuts, Cranberry Cottage Cake with Lemon Sauce, Ratatouille and this recipe for Skinny Oven Fries. Jim asks for these "fries" on a regular basis. Christopher grew up with these fries and there were never any leftovers. This recipe also works well with sweet potatoes if you are so inclined.

The only way to get a copy of this wonderful cookbook is by writing to: Colorado Dietetic Association, 6930 So. Bemis Street, Littleton, CO 80120. I bought this cookbook while living and working in Los Alamos, New Mexico in 1989, so I don't know how much the book is today but, if interested, call 1-800-798-2635.

2 tsp Parmesan cheese
1 tsp salt
1 tsp sugar
1/2 tsp garlic powder
1/2 tsp paprika
1/4 tsp onion powder
1/4 tsp chili powder
1/4 tsp lemon pepper
4 large russet potatoes (I like to leave the skins on)
1/8 cup olive oil

Preheat the oven to 350. Mix seasonings. Cut each potato into 8 wedges; toss with oil, place on baking sheet. Sprinkle potatoes with seasoning mixture, turn over and sprinkle the other side. Bake until soft when pricked, about 45 minutes or 1 hours for crisp fries.

Lamb and Lentils with a Root Vegetable Salad with Anchovy Vinaigrette

Lamb and Lentils


These recipes come from a cookbook I purchased years ago, Farm House Cookbook by Susan Herrmann Loomis ISBN: 0-89480-772-2. Travelling all across America with her husband visiting family-owned farms Loomis includes farming family favorites. Who knows better than those who till the soil and provide us with a wealth of sustinance straight from Mother Nature? After recently reading Animal, Vegetable, or Miracle by Barbara Kingsolver, I've rekindled a passion for healthy, organic foodstuffs. I was lucky to happen upon free-range lamb free of hormones or drugs. Fred Meyer carries organic and pesticide-free meats and vegetables.

The original recipe called for carrots, but I wanted and had organic yams on hand and substituted them instead.

Ingredients:
2 tsp olive oil
1 lb lamb (recipe calls for 1/2" chunks but I used ground)
2 cups water
1 cup lentils
1 medium onion, peeled and chopped
2 cloves garlic, minced
1 tsp salt
10 black peppercorns
4 sprigs fresh thyme or 1/2 tsp. dried
4 large fresh sage leaves or 1/2 tsp. dried crumbled
2 TBSP lemon juice
zest of 1/2 a lemon
2 carrots or yams, peeled and cut into bite-sized cubes
2 cups green cabbage, rough chop
salt and pepper to taste

Heat the oil in a dutch oven or soup pot. Brown lamb, add onion, garlic, salt, pepper, herbs, lentils and water. Bring to a boil, then reduce heat to medium, cover and simmer for 20 minutes. While this simmers, gently boil carrots or yams in salted water in a seperate pot (drain when tender). After 20 minutes test to see if lentils are almost done. To the lamb and lentils add lemon juice, zest, carrots and cabbage. Cook just until the cabbage is tender.


Root Vegetable Salad with Anchovy Vinaigrette


I love tubers! They store well and can be bought in large quantities and stored for months in a cool, dry place. This is a great colorful winter salad and off the grid as far as salads go. The fennel provides a clean, cool and crisp crunch. Don't be daunted by the anchovies--like a putanesca sauce, it is a necessary ingredient and no one needs to know the "mystery" ingredient in this vinaigrette.

The Salad
2 large red bell peppers, cored, seeded and quartered (reserve 1 1/2 cups to mix with fronds and vinaigrette)
2 fennel bulbs with fronds (finely chop the fronds-reserve a heaping 1/4 cup of the fronds for the vinaigrette)
8 oz rutabaga, peeled and diced
8 oz small turnips, peeled and diced

For the Vinaigrette
7 TBSP extra-virgin olive oil
3 TBSP sherry
1 TBSP balsamic vinegar (but the good stuff---don't skimp on this)
1 tsp whole-grain mustard
1/2 tsp sugar
1 cans anchovy fillets in oil, drained and minced
salt and pepper to taste

Mix chopped salad ingredients together. In a mixing bowl, whisk the vinaigrette ingredients together. In another bowl combine the reserved 1 1/2 cups red pepper and the 1/4 cup fronds with 1 TBSP of the vinaigrette. Pour the vinaigrette over the salad vegetables and toss. To plate, transfer the vegetables to a large platter. Surround the salad with the reserved pepper and fennel garnish.

Saturday, February 11, 2012

Real Men Eat Quiche! Lobster and Halibut or do you want Vegetarian?

I've put up my quice recipe before and the egg/cream mix remains the same (If you need that recipe again, either search here or email me and I'll send it again). Jim insisted I put up two seperate quiches on Mama's site. One is made of leftover lobster and halibut. The other includes mushrooms, baby peppers, onions, and broccoli. I use different cheeses for each.

Step 1: Mix the eggs, 1 cup heavy cream and 1 cup fat free half and half. Make and roll out the pie crust and fit into dish.


Lobster and halibut are enhanced with thyme...keep that but you can also substitute dill weed instead. I added some mushrooms, but the cheeses need to be a mix of a variety of cheeses that will marry and complement each other. I used a mix of Fontina, Tuscan Cheddar and Parmagianno Regianno (to equal 1 cup).


I think I could be a vegetarian. Easily! I grew up in a farming family and never met a vegetable I didn't like. In the summer, many meals on the table didn't include meat and we didn't miss it a bit. This quiche is for me! Mushrooms, tomatoes, sauteed peppers and broccoli. The cheese you need here need to be simple and not overpowering. Use a simple Monterey Jack with 1/4 the amout of Guyerre. I used basil instead of thyme.


Point to take: You cannot go wrong with quiche. Anything you put into it will be great. Just think of seasonings that the meat or vegetables they love....parsley, thyme, basil, savory, sage, nutmeg, or whatever. The list goes on.

Monday, January 30, 2012

49 meets 50! The best of two worlds

The 49th state (Alaska) Copper River Red Salmon and the 50th state (Hawaii) Big Island Macadamia Nuts combine to provide a fabulous meal!

1 lb. Copper River Red Salmon
1 egg white
1/2 cup chopped macadamia nuts
1 TBSP. Olive oil to cook the fish
1 TBSP. butter
1 TBSP. parsley
1 TBSP. lemon juice

Bone the salmon, season both sides with salt and pepper, dredge in beaten egg whites, and toss in chopped macadamia nuts mixed with parsley. Brown in hot oil for 4 minutes on each side or until flaky. Drizzle with melted butter and lemon juice.

I served this with a light salad of roots and herbs, buttered yams and steamed rice. So simple and quick. Humky hubby loved every bite and ate 3 helpings of fish.


Saturday, January 14, 2012

Ravioli Fever!

I can't seem to get enough of playing with my new pasta machine and ravioli maker. I've now made two batches of spinach ravioli and am on to now experimenting with butternut squash with sage and brown butter sauce and then try a lobster ravioli. With each batch I get better at mixing, feeling and creating a better pasta. The first time I made ravioli I made a garlic alfredo and added in some roughly chopped crimini and white mushrooms. Delicious! I have a marinar sauce with sausage, mushrooms and pepperoni that I am going to try with this batch. The key is to knead the pasta dough for at least 10 minutes and then letting it rest wrapped in plastic for at least an hour. I'm combining two recipes for my dough. From "Ultimate Pasta" by Julia Della Croce (ISBN: 0-7894-2086-4 and "Back to the Table: The Reunion of Food and Family" by Art Smith (ISBN: 0-7868-6854-6). The second book is one of my favorites and I highly recommended getting this one to add to your collection.


~2 cups flour (more for dusting the pasta and the machine)
3 eggs
1/8 tsp salt
2 tsp. vegetable oil

Weigh the flour (should be 1 lb which is about 2 cups), add salt. Slightly beat the eggs and oil. Make a well in the center of the flour and pour in egg. Using a fork, gradually add flour into the egg mix as it comes away from the sides of the bowl. When the dough is well incorporated and is too stiff to work with a fork, turn onto a lightly dusted surface and begin to knead into a ball. Continue kneading until a soft ball is made. Important: Knead the dough for a minimum of 10 minutes. Put on some music to keep your eye off the clock. Wrap the dough in plastic wrap and allow it to rest in a warm place for at least 1 hour.

While dough rests, make your filling.

Spinach Filling:
1 lb. cooked, drained to almost dry and finely chopped spinach
7 oz. Ricotta Cheese
3.5 oz grated Parmesan Cheese
2 egg yolks
1 TBSP. Breadcrumbs
Nutmeg
Salt and Pepper

Cut the dough into 2-4 smaller sizes to work with, keeping the dough you are not working with wrapped in plastic. Feed the dough through the pasta machine on the lowest setting at first, gradually tightening down the width after passing it through the machine each time. You will end up with a long, thin sheet of pasta. I like to end up on either 6 or 7 because it needs to be slightly thicker than say fettucini because it will be sandwiched. Cut off the tapered ends and fold in half.

Place the ravioli attachment onto the pasta machine. Fold the dough in half and feed the middle of the dough into the machine turning about 1/4" to begin the first seal.
Place the hopper on the attachment and spoon the filling into the middle. A sheet of ravioli will look like this:

Gently remove the edges of the ravioli (I actually saved these "noodles" and put them in a soup (waste not want not!)

Your ravioli will look like this:

Voila! Enjoy!


Thursday, January 5, 2012

Grandma Hazel's Homemade Noodles

I've always loved my Aunt Bubble's egg noodles, but recently found out when I went home to visit that the noodles were actually Grandma Hazel Johnson's (my aunts mother-in-law's) recipe. Aunt Bubbles always made a pork roast to accompany her noodles, but mom used them after Christmas day in her turkey soup. After watching how easy it is to make pasta, I drug out the old pasta machine I had received as a gift over 10 years ago but was too chicken to experiment but for a few times and a huge mess later. Well I promptly broke the blasted thing..something to do with the plastic gear that turns the paddle. Those who really know me know that I won't be daunted by a little bump in the road. I set out on a mission to get a new pasta machine like moms...ALL METAL this time and found one at the Country Kitchen store on Airport Dr. No electronics to go bad this time and pasta is extruded by human work. Well, sitting right next to this little thing was a ravioli maker that I had to have as well.
The outcome was a success! The egg noodles are drying on the table to be stored in a glass jar for whenever I want noodles. In the meantime, I've made another batch of linguini that we had last night and bought some fresh spinach and cheeses to make ravioli.
Grandma Hazel's Egg Noodles 3-4 cups flour (I mixed 1/2 Semolina and 1/2 bread flour) 4 egg yolks dash of salt egg shell-to measure water (4-5 shells--or enough to just moisten and stick together) Make a well in the flour. Add eggs, salt and water. Begin to incorporate the flour, eggs and water a little at a time until a ball begins to form. Knead the dough for ten minutes (don't skimp on this step). The dough should feel tough and difficult to knead--not crumbly and not sticky.
Wrap the ball of dough in plastic wrap and allow it to rest for one hour. (Aunt B doesn't let it rest at all, Mom lets it rest for 10 minutes, but I like one hour because it seems easier to work with.) Cut the dough into six portions and, work with one ball of dough at a time keeping the rest of the dough wrapped so it doesn't dry out. Pat the dough into a rectangle or circle thin enough to feed through your pasta machine (or roll out into a thin sheet and cut noodles if you don't have a machine). Keep the noodles and the machine or working surface lightly dusted with flour. Use the noodles right away or dry and store them to be used later. Take care not to overcook the noodles. They only need about 10 minutes in boiling water or broth--check to taste al dente. Voila! Now I am on the lookout for new pasta recipes!

Sunday, January 1, 2012

Seafood Pasta I know it's New Years Eve and I'm supposed to post something that includes black-eyed peas or dark green veggies....The black eyed peas are already cooked and on the stove and I took out a can of 2010 turnip greens that I will heat up tomorrow morning. I did make it to midnight 2012. I just can't buy into the whole 2012---the sky if falling idea...sorry...I won't be Chicken Little. If the end of the world is coming...then let it come. I don't voice it in public but I do completely believe in T. S. Eliot's quote, "The world will not end with a bang, but with a whimper." I've tried to live my life by this quote. Meaning....be ready for it at any time. Don't be forced to ask for forgiveness at the last moment. Live every day as though it is your last and give everything you have to those around you. Go out of this world with no regrets. Believe in karma and always try to do for others and be kind. What will be will be and we can't stop it. I could expand on my thoughts but that would be a whole different venue. Instead......I made a fabulous dish of wild caught jumbo shrimp and Alaska caught scallops. Just coming back from New Mexico...I had some fabulous hot green chile that begged to be cooked. I found a recipe by mom that called for both ingredients and a salsa and green chile mix served over pasta.
3/4 cup chopped green onions 2 garlic cloves, diced Olive oil 1/2 cup chicken broth or white wine 1 1/2 cups salsa 4 oz. green chile 1 TBSP lime juice 1 Lb. shrimp uncooked, deveined 1 Lb. bay scallops, cubed 12 oz. pasta Prepare pasta according to directions. Saute onions and garlic in olive oil. Add broth or wine and simmer 3 minutes. Stir in salsa, chile and lime juice. Add shrimp and scallops, cook for 4-5 minutes or until shrimp turns pink and scallops are done. Serve over pasta and top with parmesean cheese. Happy New Year!